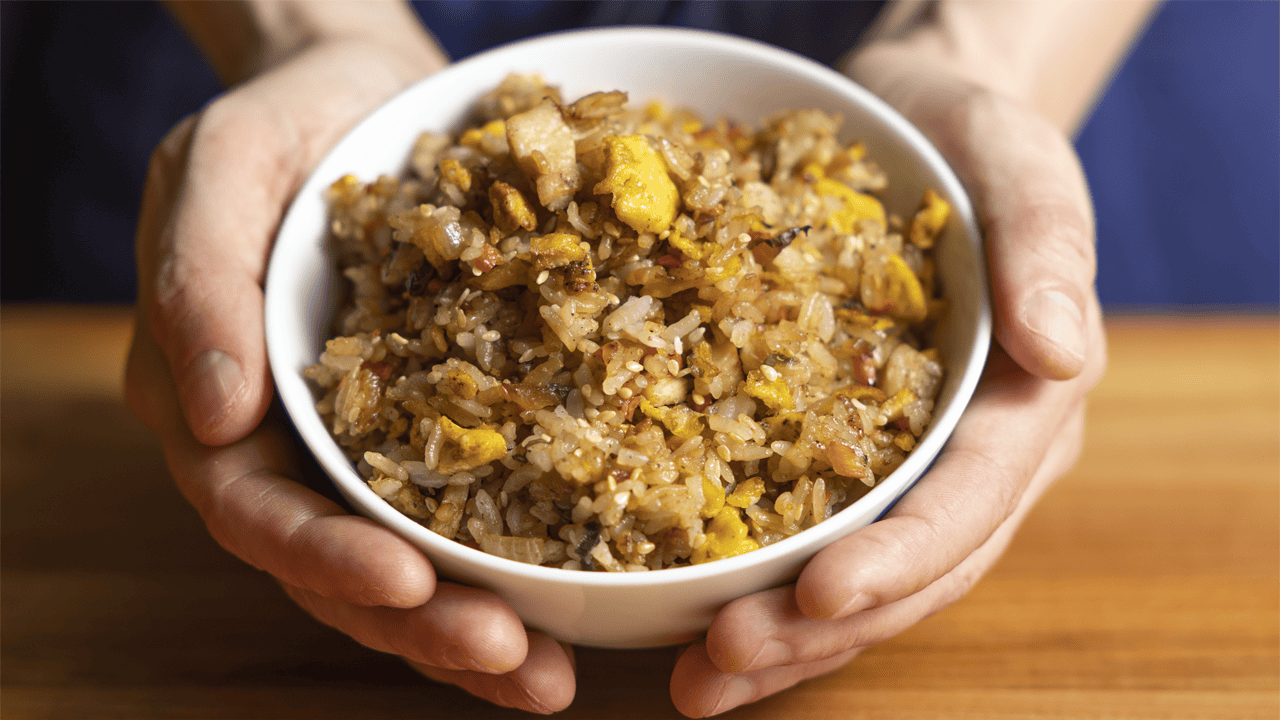
Benihana Fried Rice Recipe
I've made Benihana's fried rice at home hundreds of times over the past several years. The thing that took the longest to figure out is that how much moisture is left in the cooked rice matters more than how sticky the rice is. Calrose is naturally sticky, and no amount of rinsing or refrigerating is going to change that completely. What you can control is how dry the grains are before they hit the hot pan.
The other thing most hibachi fried rice recipes overlook is the garlic butter. Benihana's version is a compound butter made with Kikkoman soy sauce and fresh garlic. It's the ingredient that gives their fried rice its distinctive taste, and it's absurdly easy to make at home.
This post contains affiliate links, which means I may earn a small commission if you make a purchase. It doesn't cost you anything extra. Full disclosure.
Why This Benihana Fried Rice Recipe Works
- Calrose rice, the same medium-grain variety Benihana serves. It's stickier than long-grain rice because it's higher in a starch called amylopectin, which is what makes rice grains cling together. Most Japanese fried rice uses short grain, which is even stickier. That stickiness is normal and expected for this style of fried rice.
- Hibachi garlic butter with soy sauce and fresh garlic. This compound butter is what gives Benihana's fried rice its specific flavor. It's just butter, garlic, and Kikkoman soy sauce mixed together at room temperature. Takes about two minutes.
- Three rice cooking methods, tested and ranked. Rice cooker is best, steaming is second, traditional stovetop is third. Each method produces different moisture levels and needs different rest time before frying.
- Soy sauce directly on the hot pan, not on the rice. Adding soy sauce to the exposed pan surface lets it caramelize slightly before you stir the rice into it. It gives you more depth of flavor than pouring it directly on the rice.
- Each ingredient cooked separately, then combined at the end. Chicken, eggs, and vegetables are cooked one at a time in the same pan, wiped clean between each. This prevents crowding and lets each component cook properly on its own.
Ingredients You'll Need
Calrose rice. This is the specific type of rice Benihana uses. Botan is the exact brand they serve, but Nishiki and Kokuho Rose work just as well. Any medium-grain calrose rice will give you the right texture. If you can't find calrose, jasmine rice works fine. The dish will taste slightly different since jasmine is a long-grain rice that's naturally less sticky, but it's a solid substitute.
Kikkoman soy sauce. Benihana uses Kikkoman, which is a Japanese-style soy sauce. It's lighter and less salty than Chinese light soy sauce. If you substitute Chinese soy sauce, use a little less.
Unsalted butter. You'll need this for the hibachi garlic butter. Unsalted lets you control the seasoning, since the soy sauce in the compound butter already adds salt.
Safflower oil. This is what Benihana uses at the restaurant, but any neutral oil works: vegetable, canola, avocado. You'll need less oil than you think. About a teaspoon per cup of rice for the frying step, plus small amounts for cooking the chicken, eggs, and vegetables.
Sesame seeds. Added at the very end for nuttiness and texture. You can toast them first in a dry pan if you want a stronger sesame flavor.
How to Cook Rice for Fried Rice
This section matters more than the actual frying. Get the rice right and the rest of the recipe is straightforward.
Wash your rice first. Put it in a strainer inside a bowl, fill with water, swirl 5-10 times, drain, and repeat 3-5 times until the water is a bit clearer than when you started. You're removing surface starch to get slightly less sticky, slightly drier grains after cooking. Don't overdo it. If you leave the rice in water too long, you can overhydrate it and end up with soggy fried rice. At home, washed rice gives you a noticeably drier final product.
Method 1: Rice cooker (best). Follow your machine's instructions. If it has a "harder rice" setting, use it. Harder rice means slightly less moisture, which is ideal for frying. Rice from a cooker can go straight into the fried rice after letting the surface moisture evaporate at room temperature for 10-15 minutes.
Method 2: Steaming (second best). Weigh your rice in grams, then use the exact same number in milliliters of water. So 180g of rice gets 180ml of water. Put a steamer insert or colander in a pot with about an inch of water at the bottom. Place the rice and measured water in a bowl on top of the insert. Bring the pot water to a boil, put the lid on, lower to a simmer, and cook for 20 minutes. Kill the heat and let it steam for 10 more minutes with the lid on. The result is virtually the same quality as a several-hundred-dollar rice cooker. Let the surface moisture evaporate at room temperature for 10-15 minutes before using.
Method 3: Traditional stovetop (third best). Use a 1:1 ratio of rice to water by volume, plus one extra tablespoon (14ml) of water to account for evaporation. So one cup of rice gets one cup plus one tablespoon of water. Bring to a boil, lid on, lower to medium-low, cook for 10 minutes. Kill the heat and steam with the lid on for 10 more minutes. Transfer to a baking sheet and fluff the grains. With this method, you really want to refrigerate the rice uncovered for 12-24 hours before using. The dry circulating air in your fridge dehydrates the surface of each grain. If you can't wait that long, at least let it sit uncovered at room temperature for several hours.
How to Make Benihana Fried Rice
This recipe goes fast once you start cooking. Have everything weighed, measured, and within arm's reach before you turn on the heat. You can do the entire recipe in one pan, but you need to cook each ingredient separately and wipe the pan clean between steps.
1. Cook the chicken. Heat a bit of oil in your largest cast iron or nonstick skillet over medium heat. Season the chicken cutlets with salt and pepper and cook on both sides until done, about 1-2 minutes total since they're so thin. Remove to a cutting board. Make slices about ¼ inch thick, then turn them perpendicular and cut into small cubes. Return the cubed chicken to the pan, add 1 teaspoon of garlic butter and a bit more salt and pepper, and toss until the butter melts and coats the chicken. Transfer to a bowl.
2. Cook the eggs. Wipe out the pan with a wet paper towel. Return to medium heat with a bit of oil. Add the beaten eggs, season with salt and pepper, and break them up as they cook. You don't want large pieces of scrambled egg in the final dish. Once set, add to the bowl with the chicken.
3. Cook the vegetables. Wipe the pan again. Medium heat, a bit of oil. Add the onion and carrot, season with salt and pepper, and cook until slightly softened, about 2 minutes. The fine dice means they cook fast. Add the green onion, stir to combine, and kill the heat. Transfer to the bowl with the chicken and eggs.
4. Fry the rice. Wipe the pan one more time. Medium heat, about 2 teaspoons of oil (a teaspoon per cup of rice). If you use too much oil, the dish ends up greasy because you're also adding garlic butter later. Spread the rice out and let it cook for 2-3 minutes, gently breaking up any clumps and turning it over. Give the rice room in the pan. If you crowd it, the moisture can't evaporate, and you end up steaming the rice instead of frying it.
5. Combine and add garlic butter. Add the bowl of cooked chicken, eggs, and vegetables to the rice. Stir until everything is well combined. Add 1 tablespoon of hibachi garlic butter plus salt and pepper to taste. Stir until the butter melts and coats everything evenly. Cook for about 1 minute.
6. Add the soy sauce. Push the rice to one side of the pan. Add the soy sauce directly to the exposed pan surface. Once it sizzles, immediately stir the rice into the soy sauce. Keep stirring with a cutting motion until all the white chunks of rice are gone and the color is uniform.
7. Finish with sesame seeds. Kill the heat, toss in the sesame seeds, stir to distribute, and serve. Garnish with extra sesame seeds or sliced green onion.
Tips for the Best Benihana Fried Rice
Cut your vegetables and chicken small. The most common mistake is cutting the carrot and onion too large. You're going for a brunoise: 2-3mm cubes. The carrot gets peeled, squared off, cut into thin sheets, then julienned, then diced across. The onion just needs a very fine dice. Green onion gets sliced as thin as you can manage. Same with the chicken: thin cutlets sliced about ¼ inch thick, then cubed. If any ingredient is too large, it dominates the bite instead of blending in.
Cook in batches if you're feeding more than two people. You need the rice to have direct contact with the hot pan so the moisture evaporates. A pan full of rice just steams, and you end up with exactly the mushy texture you were trying to avoid. The recipe below scales to 4 and 8 servings, but always cook 2 servings at a time in the pan.
Season at every step. Salt and pepper go on the chicken, the eggs, the vegetables, and the rice. Seasoning once at the end doesn't layer the flavor the same way. Do a final taste test before serving and adjust.
Make the hibachi garlic butter ahead. Take 2 tablespoons of unsalted butter at room temperature and mix in ½ teaspoon of minced garlic and ½ teaspoon of Kikkoman soy sauce. Stir until completely combined with no liquid pooling at the bottom. This keeps in the fridge for a few days and scales up easily if you want to keep a batch on hand.
Wipe the pan between each step. A wet paper towel between cooking the chicken, eggs, vegetables, and rice gives each ingredient a fresh cooking surface. Leftover bits from the previous step can burn and stick to the next one.
What to Serve With Benihana Fried Rice
Fried rice at Benihana is served alongside the main teppanyaki proteins. If you're putting together a full hibachi dinner at home, pair it with Japanese Teriyaki Chicken for the most traditional combination. You can also swap the chicken in the fried rice for steak, shrimp, or leave the protein out entirely for a vegetarian egg-only version.
If you want to try a different style of fried rice, my Chinese Takeout Fried Rice uses a similar technique with a different seasoning approach. For a restaurant-specific variation, Din Tai Fung Shrimp Fried Rice uses a different rice type and flavor profile.
Storage and Reheating
Leftover fried rice keeps in an airtight container in the fridge for 3-4 days. Reheat in a skillet over medium heat with a small amount of oil. Microwave works but the stovetop gives you a better texture since it re-crisps the rice a bit. Fried rice freezes well for up to 2 months in a freezer bag with the air pressed out. Thaw overnight in the fridge before reheating.
Frequently Asked Questions
Do I need to use day-old rice for fried rice?
Not always. With a rice cooker or the steaming method, rice can go straight into the fried rice after letting the surface moisture evaporate at room temperature for 10-15 minutes. The traditional stovetop method produces a wetter grain that benefits from 12-24 hours uncovered in the fridge. The dry circulating air dehydrates the surface of each grain, which is exactly what you want before frying.
Can I use a different type of rice?
Yes. Jasmine rice is the most common substitute and it works well. The flavor and texture will be slightly different since jasmine is a long-grain rice with less amylopectin (the starch that makes rice grains cling together), so it won't be as sticky. Really any rice you have on hand will work as a base for this technique.
What if I don't have safflower oil?
Any neutral oil works. Vegetable, canola, avocado. There's no meaningful flavor difference between neutral oils at the amounts used here.
Can I make this without chicken?
Yes. Replace the chicken with steak cut into small cubes, or shrimp that's been peeled, deveined, and cut into small pieces. Or leave the protein out entirely for an egg-only vegetarian version. The fried rice technique is identical regardless of protein.
What rice cooker do you recommend?
Zojirushi makes the best consumer rice cookers. They have models at every price point, from entry-level to high-end. Any Zojirushi with a "harder rice" setting is ideal for fried rice. Links to three recommended models are in the recipe card equipment section below.
More Benihana Recipes
- Benihana Garlic Butter
- Benihana Hibachi Onion Soup
- Benihana Yakisoba
- Benihana Teriyaki Sauce
- Benihana Teriyaki Chicken
- Benihana Teriyaki Steak
- Benihana Spicy Teriyaki
- Hibachi Chicken
- Hibachi Steak
- Hibachi Shrimp
- Hibachi Vegetables
- Benihana Yum Yum Sauce
- Benihana Spicy Sauce
- Benihana Diablo Sauce
- Benihana Ginger Salad Dressing
- Benihana Mustard Dipping Sauce
- Benihana Ginger Dipping Sauce
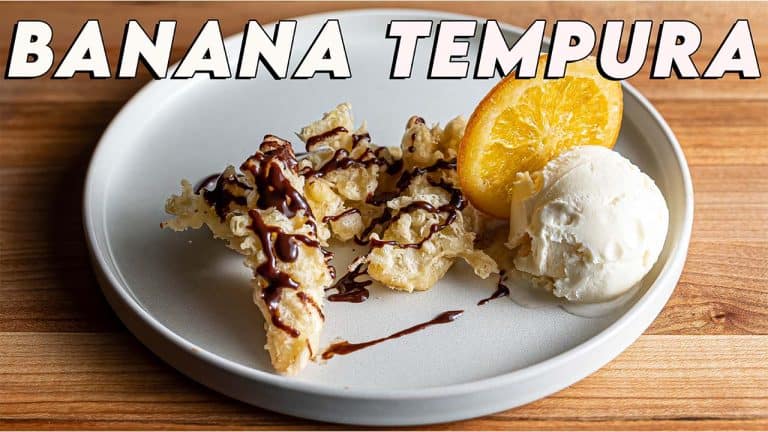
- Banana Tempura
- Every Benihana Recipe (Complete Guide)
More Japanese Recipes
More Teriyaki Recipes
More Fried Rice Recipes
- Chinese Takeout Fried Rice
- P.F. Chang's Fried Rice
- Din Tai Fung Shrimp Fried Rice
- Thai Takeout Fried Rice
Recipe
Benihana Fried Rice
Equipment
- 1 12-inch Lodge Cast Iron Skillet Or any large skillet
- 1 Anchor Glass Ramekins for mise en place
- 1 Budget Zojirushi Rice Cooker Entry-level option
- 1 Zojirushi rice cooker Top-of-the-line option
- 1 Baking Sheet For cooling rice
- 1 Whisk For beating eggs
- 1 Mixing Bowls For assembling cooked ingredients
Ingredients
Fried Rice
- 2 cup cooked calrose rice made from about 1 cup (180g) uncooked rice
- 2 large eggs beaten until uniform in color
- 2 oz chicken breast thinly sliced, about ¼ inch thick
- ½ cup yellow onion finely diced (brunoise)
- 2 tablespoon carrot finely diced (brunoise, 2-3mm cubes)
- 2 tablespoon green onion very finely sliced, tops only
- 2 teaspoon sesame seeds
- 1 tablespoon Japanese soy sauce Kikkoman
- 1 tablespoon hibachi garlic butter recipe below
- safflower oil or any neutral oil (vegetable, canola, avocado)
- kosher salt
- black pepper
Hibachi Garlic Butter
- 2 tablespoon unsalted butter softened to room temperature
- ½ teaspoon garlic minced
- ½ teaspoon Japanese soy sauce Kikkoman
Instructions
Make the Hibachi Garlic Butter
- Allow 2 tablespoons of unsalted butter to come to room temperature. Add ½ teaspoon of minced garlic and ½ teaspoon of Kikkoman soy sauce. Mix the garlic and soy sauce into the butter until it's completely combined and you don't see any liquid at the bottom of the bowl. Set aside.
Cook the Chicken
- Heat a bit of safflower oil in a large cast iron or nonstick skillet over medium heat. Season the chicken cutlets on both sides with salt and pepper. Cook until done, about 1-2 minutes total. Remove to a cutting board.
- Make slices approximately ¼ inch (½ cm) thick, then turn perpendicular and make cuts the same size to create small cubes. Return the cubed chicken to the pan.
- Add 1 teaspoon of garlic butter and salt and pepper to taste. Toss the chicken in the garlic butter until it melts and coats the chicken. Transfer to a bowl.
Cook the Eggs
- Wipe out the pan with a wet paper towel. Return to medium heat and add a bit of oil. Once hot, add the beaten eggs and season with salt and pepper.
- Break up the egg as it cooks. You don't want large pieces of scrambled egg in the final dish. Once the egg is fully set, add it to the bowl with the chicken.
Cook the Vegetables
- Wipe out the pan again. Return to medium heat and add a bit of oil. Once hot, add the onion and carrot. Season with salt and pepper and cook until slightly softened, about 2 minutes.
- Add the green onion, stir to combine, and turn off the heat. Transfer the cooked vegetables to the bowl with the chicken and eggs.
Fry the Rice
- Wipe out the pan one more time. Return to medium heat and add about 2 teaspoons of oil (1 teaspoon per cup of rice). Too much oil will make the final dish greasy since you're also adding garlic butter.
- Once the oil is hot, add the rice and spread it out in the pan. Break up any large chunks with a spatula and cook for 2-3 minutes, turning the rice over and letting the heat separate the grains. Don't crowd the pan. The rice needs room for the moisture to evaporate.
- Add the bowl of cooked chicken, eggs, and vegetables to the rice. Stir until well combined. Add 1 tablespoon of hibachi garlic butter and salt and pepper to taste. Stir until the butter melts and coats everything. Cook for about 1 minute.
- Push the rice to one side of the pan. Add the soy sauce directly to the exposed pan surface (not on top of the rice). Once the soy sauce sizzles, immediately stir the rice into it. Keep stirring with a cutting motion until all the rice is uniformly seasoned and you don't see any large chunks of white rice.
- Kill the heat. Add the sesame seeds, stir until combined, and serve. Garnish with additional sesame seeds or sliced green onion.